Bike polo is proudly D.I.Y. Although there may be several commercial mallet options that are pretty kick ass (St. Cago, Milwaukee, Fixcraft), it is always more fun to build your own mallet. There is no one right way; everyone puts their own little twist on the basic design (Hardcourt’s, Boise’s, Legit’s).
Here’s a step by step guide on how to build a decent, solid mallet. Improvise, make it your own, bring it to the court and score big fat goals!
-

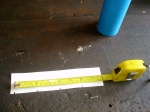
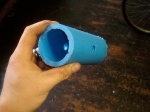
- Measure a length of HDPE pipe (ABS is ok, but PVC will shatter on impact), usually 5″ to 6″.
-

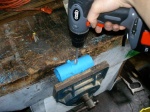
- Cut the pipe with a hacksaw. The straighter the cut the straighter your shots.
-
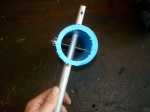
- Wrap a piece of paper around the pipe and divide the circumference into four.
-

- Use this piece of paper to help locate the quarter points at the middle of the pipe.
-
- Mark the quarter points at the middle of the pipe.
-
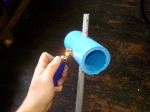
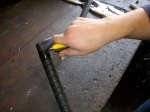
- Hold the tapered end of a ski pole against the pipe and mark where the top and bottom of the mallet head will be.
-

- Find a drill bit that is as close to, but not bigger than the diameter of the pole at those points.
-
- Due to the taper in the pole, you will need to match up another drill bit for the second point marked.
-
- Drill holes at the top and bottom of the head with the two bits chosen using the quarter points marked.
-
- The hole at the bottom of the head should be slightly smaller that the one at the top.
-

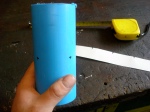
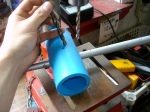
- Slide the tapered end of the ski pole into the bigger of the two holes first.
-
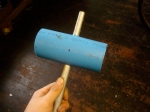
- Slide the head as far down the pole as it will go. The taper in the pole will create a tight interference fit.
-

- Find a drill bit that is the same size as the bolt you will be using.
-

- And another drill bit that is the same size as the T-nut outer diameter.
-

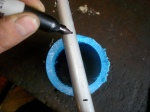
- Using the smaller drill bit and the other quarter points as a guide, line up your drill. You will be drilling through the whole assembly, so it is important to have the bit at the crest of the pipe and centred exactly over the pole.
-

- Drill through the pipe and pole straight through to the other end of the pipe.
-
- Use the larger bit to widen one of the holes in the mallet head.
-

- Widen the hole in the head but not the ski pole.
-
- Slide the bolt and T-nut on. The widened hole is for the T-nut side.
-
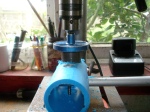
- Soften the plastic / heat the metal on the T-nut side a bit with a lighter. This will help the T-nut sink in properly.
-

- Quickly tighten up the bolt. Tighten too much and the head will squeeze out into an oval, but too little and the bolt might unthread itself during play.
-

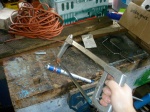
- Cut the excess bolt off with a hacksaw.
-

- Cut the excess pole off with a hacksaw.
-

- File any sharp edges.
-

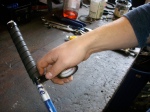
- Measure the length of your mallet. A good starting point is the distance from the floor to your tailbone.
-
- Cut the mallet to your preferred length.
-
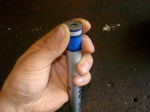
- Always cap the grip end of the pole with a washer or coin. A bar end plug works well too.
-
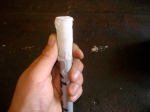
- Keep the cap in place with tape. (Ice) Hockey tape or athletic tape is good.
-
- Lighten the mallet head by cutting holes in any pattern you like. Avoid putting holes where the mallet will wear the most; that is the round shooting end roughly at the 5 o’clock position.
-
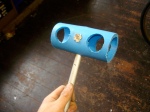
- The completed head.
-

- Take an old bike tube and start wrapping your grip from the bottom, fixing the tube in place with tape.
-
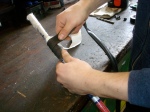
- Placing the tape above the tube, half on the tube and half on the pole, allows you to hide the tape with the tube on the next pass around.
-

- Finish the end with electrical tape.
-
- Cut off the excess tube.
-
- Tape the bottom of your grip too.
-

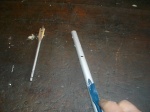
- The completed grip.
-

- And there you have it, your very own home made mallet.
